


Welcome to this week’s watercolor tutorial, where we’ll explore 12 foundational techniques that will expand your creative toolkit. These methods will help you develop fluidity, depth, and expression in your paintings. Each technique offers unique possibilities for creating texture, blending, and form.
I decided to taking a slight departure from my usual nature-inspired themes because many of you have requested a dedicated session focused on watercolor techniques. Whether you’re a beginner or a seasoned artist, these 12 versatile methods will expand your creative toolkit and enhance your watercolor confidence. Let’s dive in.
1. Wet-on-Wet
In this technique, you’ll apply wet paint onto a wet surface, creating beautifully soft and fluid blends. The colors will organically flow into one another, producing unpredictable and atmospheric effects. This is perfect for painting skies, water, or dreamy abstract backgrounds.
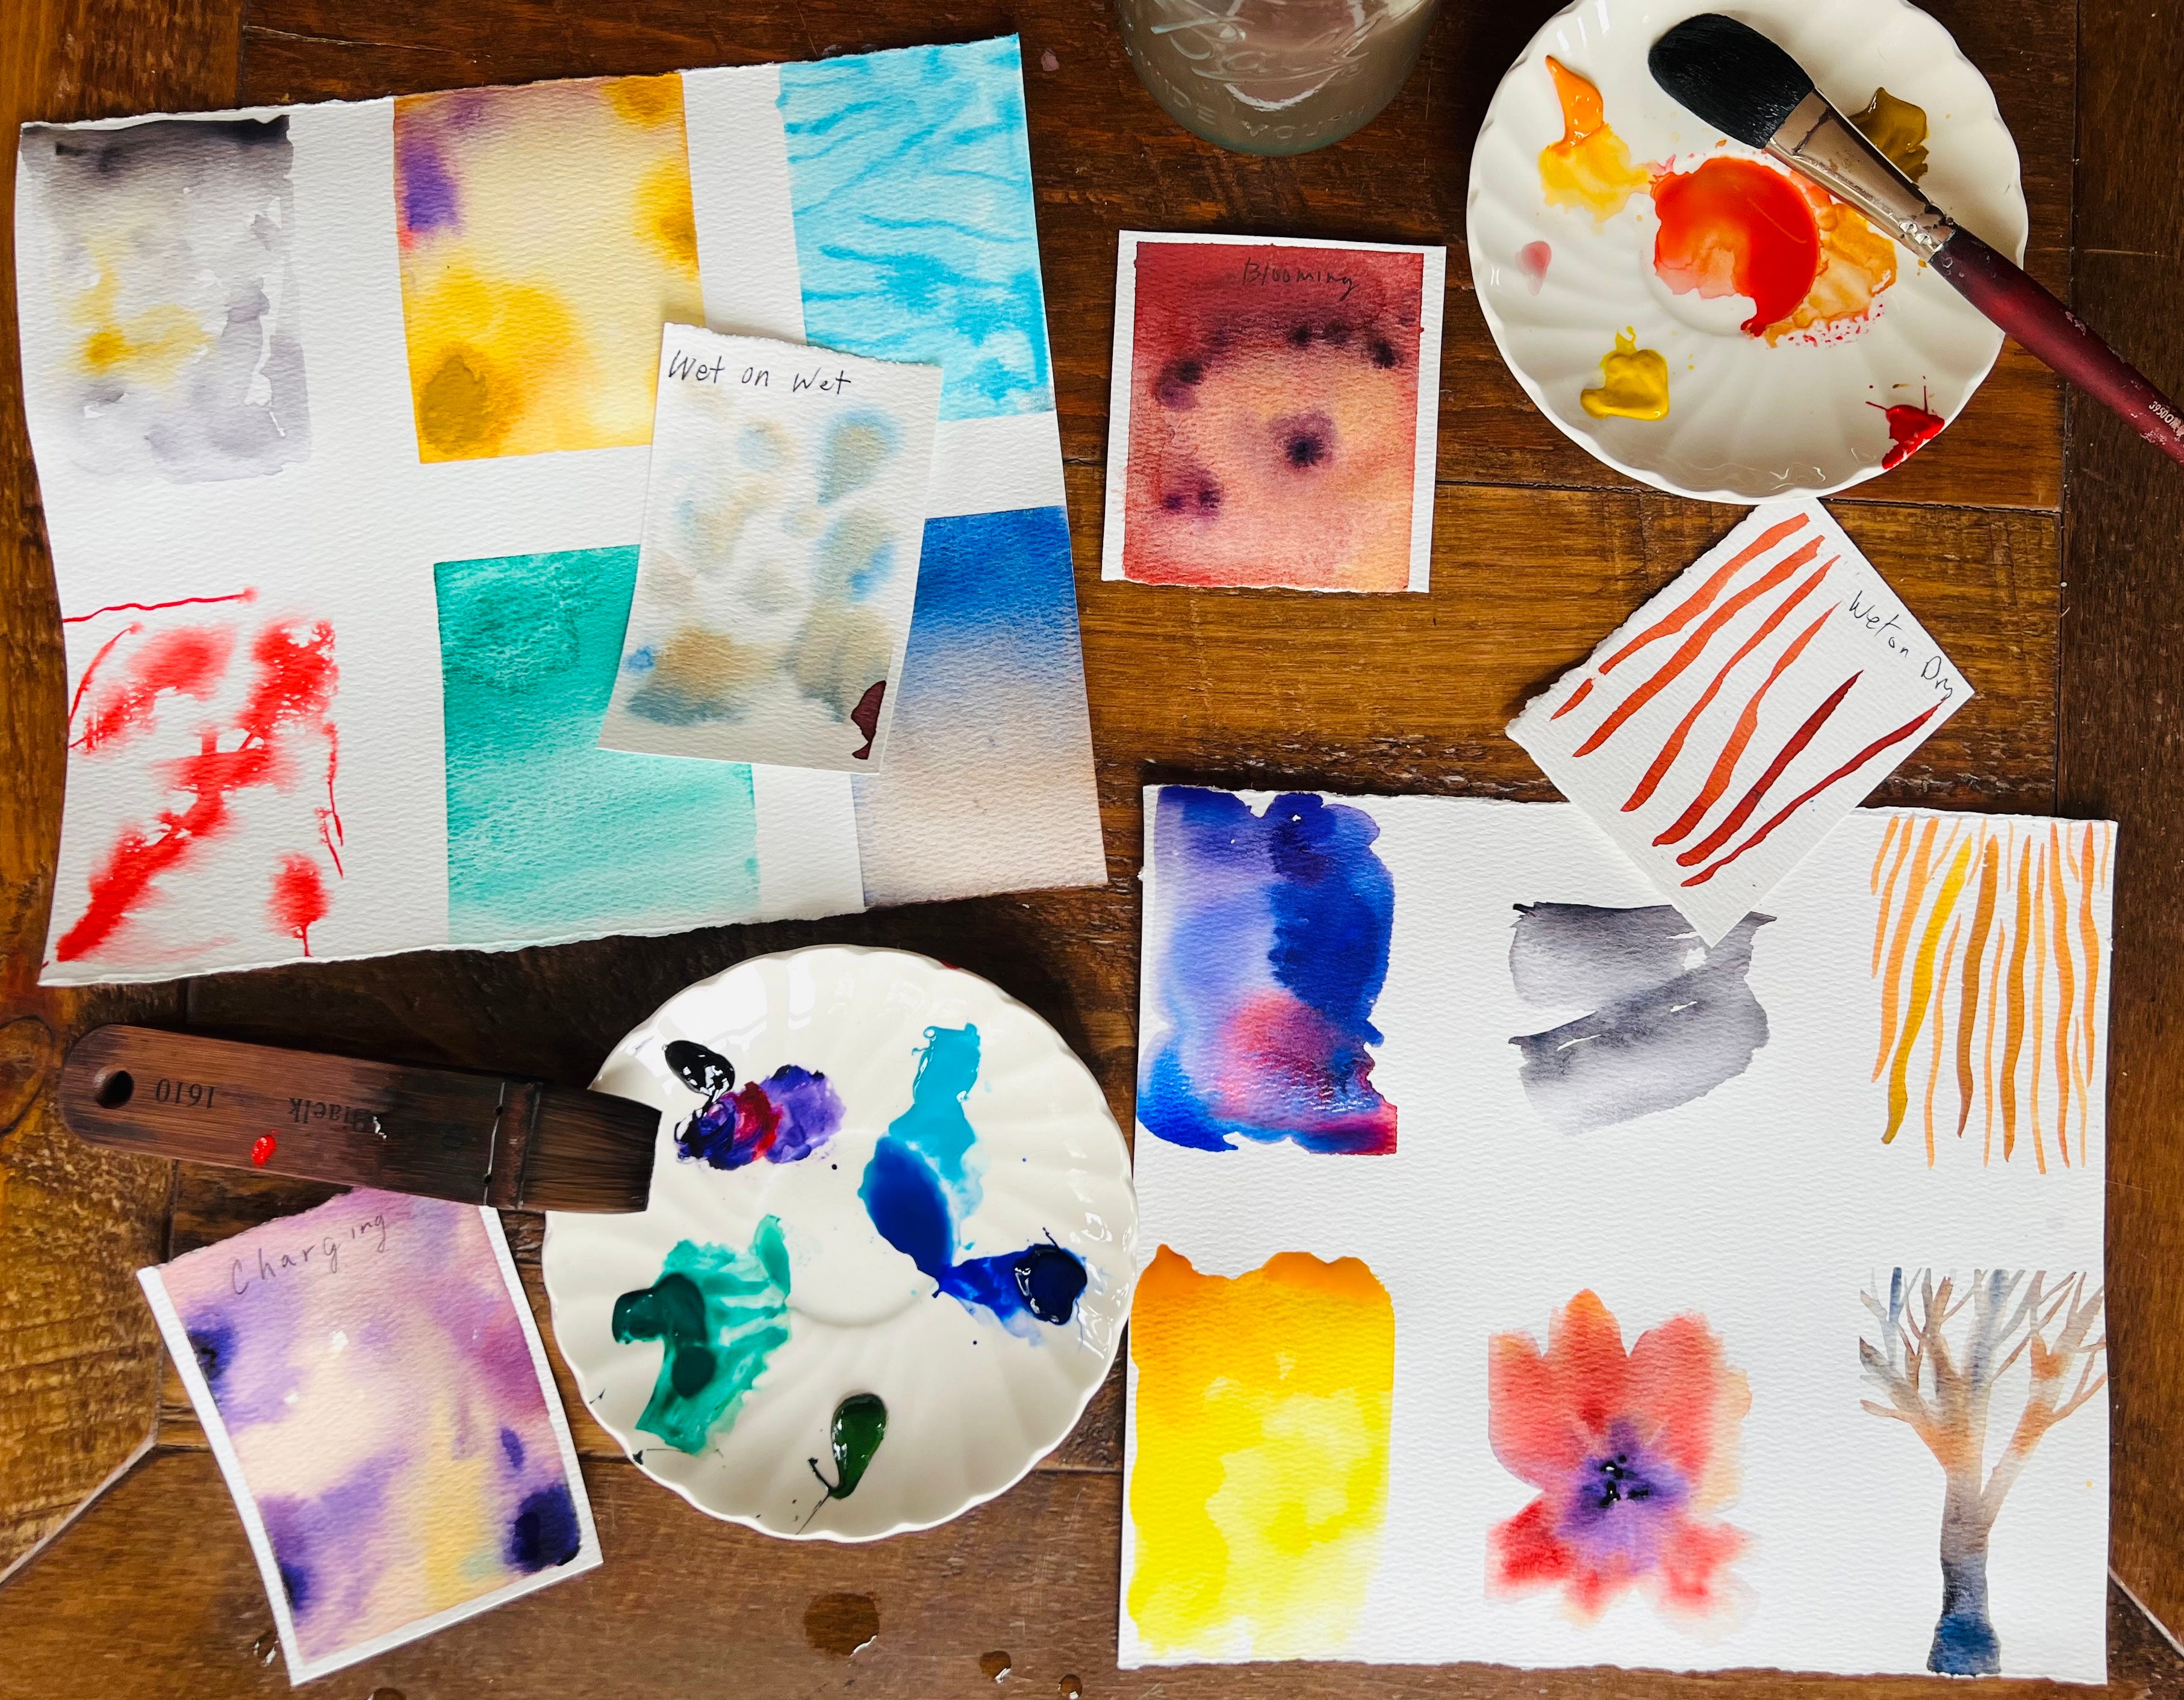
Tip: Work quickly while the surface is still damp to allow the pigments to move freely.
2. Charging
Charging is the process of dropping or brushing a second color into a freshly painted, still-wet area. This allows the colors to merge naturally, creating smooth transitions or subtle color variations.
Effect: The edges where the colors meet will softly feather, offering a rich, painterly quality. This technique works well for petals, leaves, or soft shadows.
3. Wet-on-Damp 1
For this method, you’ll apply paint onto slightly damp paper. The moisture level is key—the paper is no longer glistening but still cool to the touch. The pigment spreads gently, creating soft edges without the uncontrolled blooms of wetter surfaces.
Use this for: Distant trees, subtle cloud forms, or delicate texture details.
4. Wet-on-Wet with Thick, Dark Paint
This technique involves loading your brush with rich, heavily pigmented paint and applying it onto a wet surface. The bold, dark color will spread, but with a more dramatic, defined presence than thinner washes.
Result: The edges will diffuse while the center remains intense, creating depth and contrast. It’s excellent for moody skies, stormy seas, or dramatic shadows.
5 A. Wet-on-Wet Gradient (One Color)
For this method, start by wetting your paper with clean water, then apply a single color. Use horizontal strokes to gradually reduce the intensity of the paint as you move across the surface, creating a smooth, fading gradient.
Effect: This is perfect for painting subtle skies, soft backgrounds, or water reflections.
5 B. Removing Paint with a Dry Brush or Cloth
This technique involves lifting pigment by blotting with a dry brush, cloth, or paper towel. It’s an effective way to create highlights or soften harsh edges.
Tip: Use this method to add texture to clouds, create sunlit patches, or add reflective highlights on water.
6. Wet-on-Wet Gradient (Two Colors)
In this variation, you’ll create a seamless gradient using two colors. Start with a wet surface and apply one color at one end, gradually adding the second color from the opposite end. Let the pigments merge naturally in the center.
Use this for: Dramatic skies, colorful landscapes, or water reflections with sunset hues.
7. Blooming
Blooming occurs when you drop clean water or a lighter wash into a wet painted area. The added moisture pushes the pigment outward, creating organic, radiating shapes that resemble blossoms.
Effect: This technique adds movement and texture, perfect for ethereal effects in clouds, petals, or abstract patterns.
8. Pulling Color
Lay the line or lines using a fully loaded brush, paint a clean, dark line on dry paper. Pull the color with a damp (not dripping) brush, gently drag the color downward from the edge of the line. Feather the edge by softening the bottom edge by blending with a clean, damp brush, creating a smooth transition as the pigment fades. This is perfect for creating shadows, contours, and depth in watercolor landscapes, florals, or abstract washes.
Effect: Soft gradient wash with a natural fade.
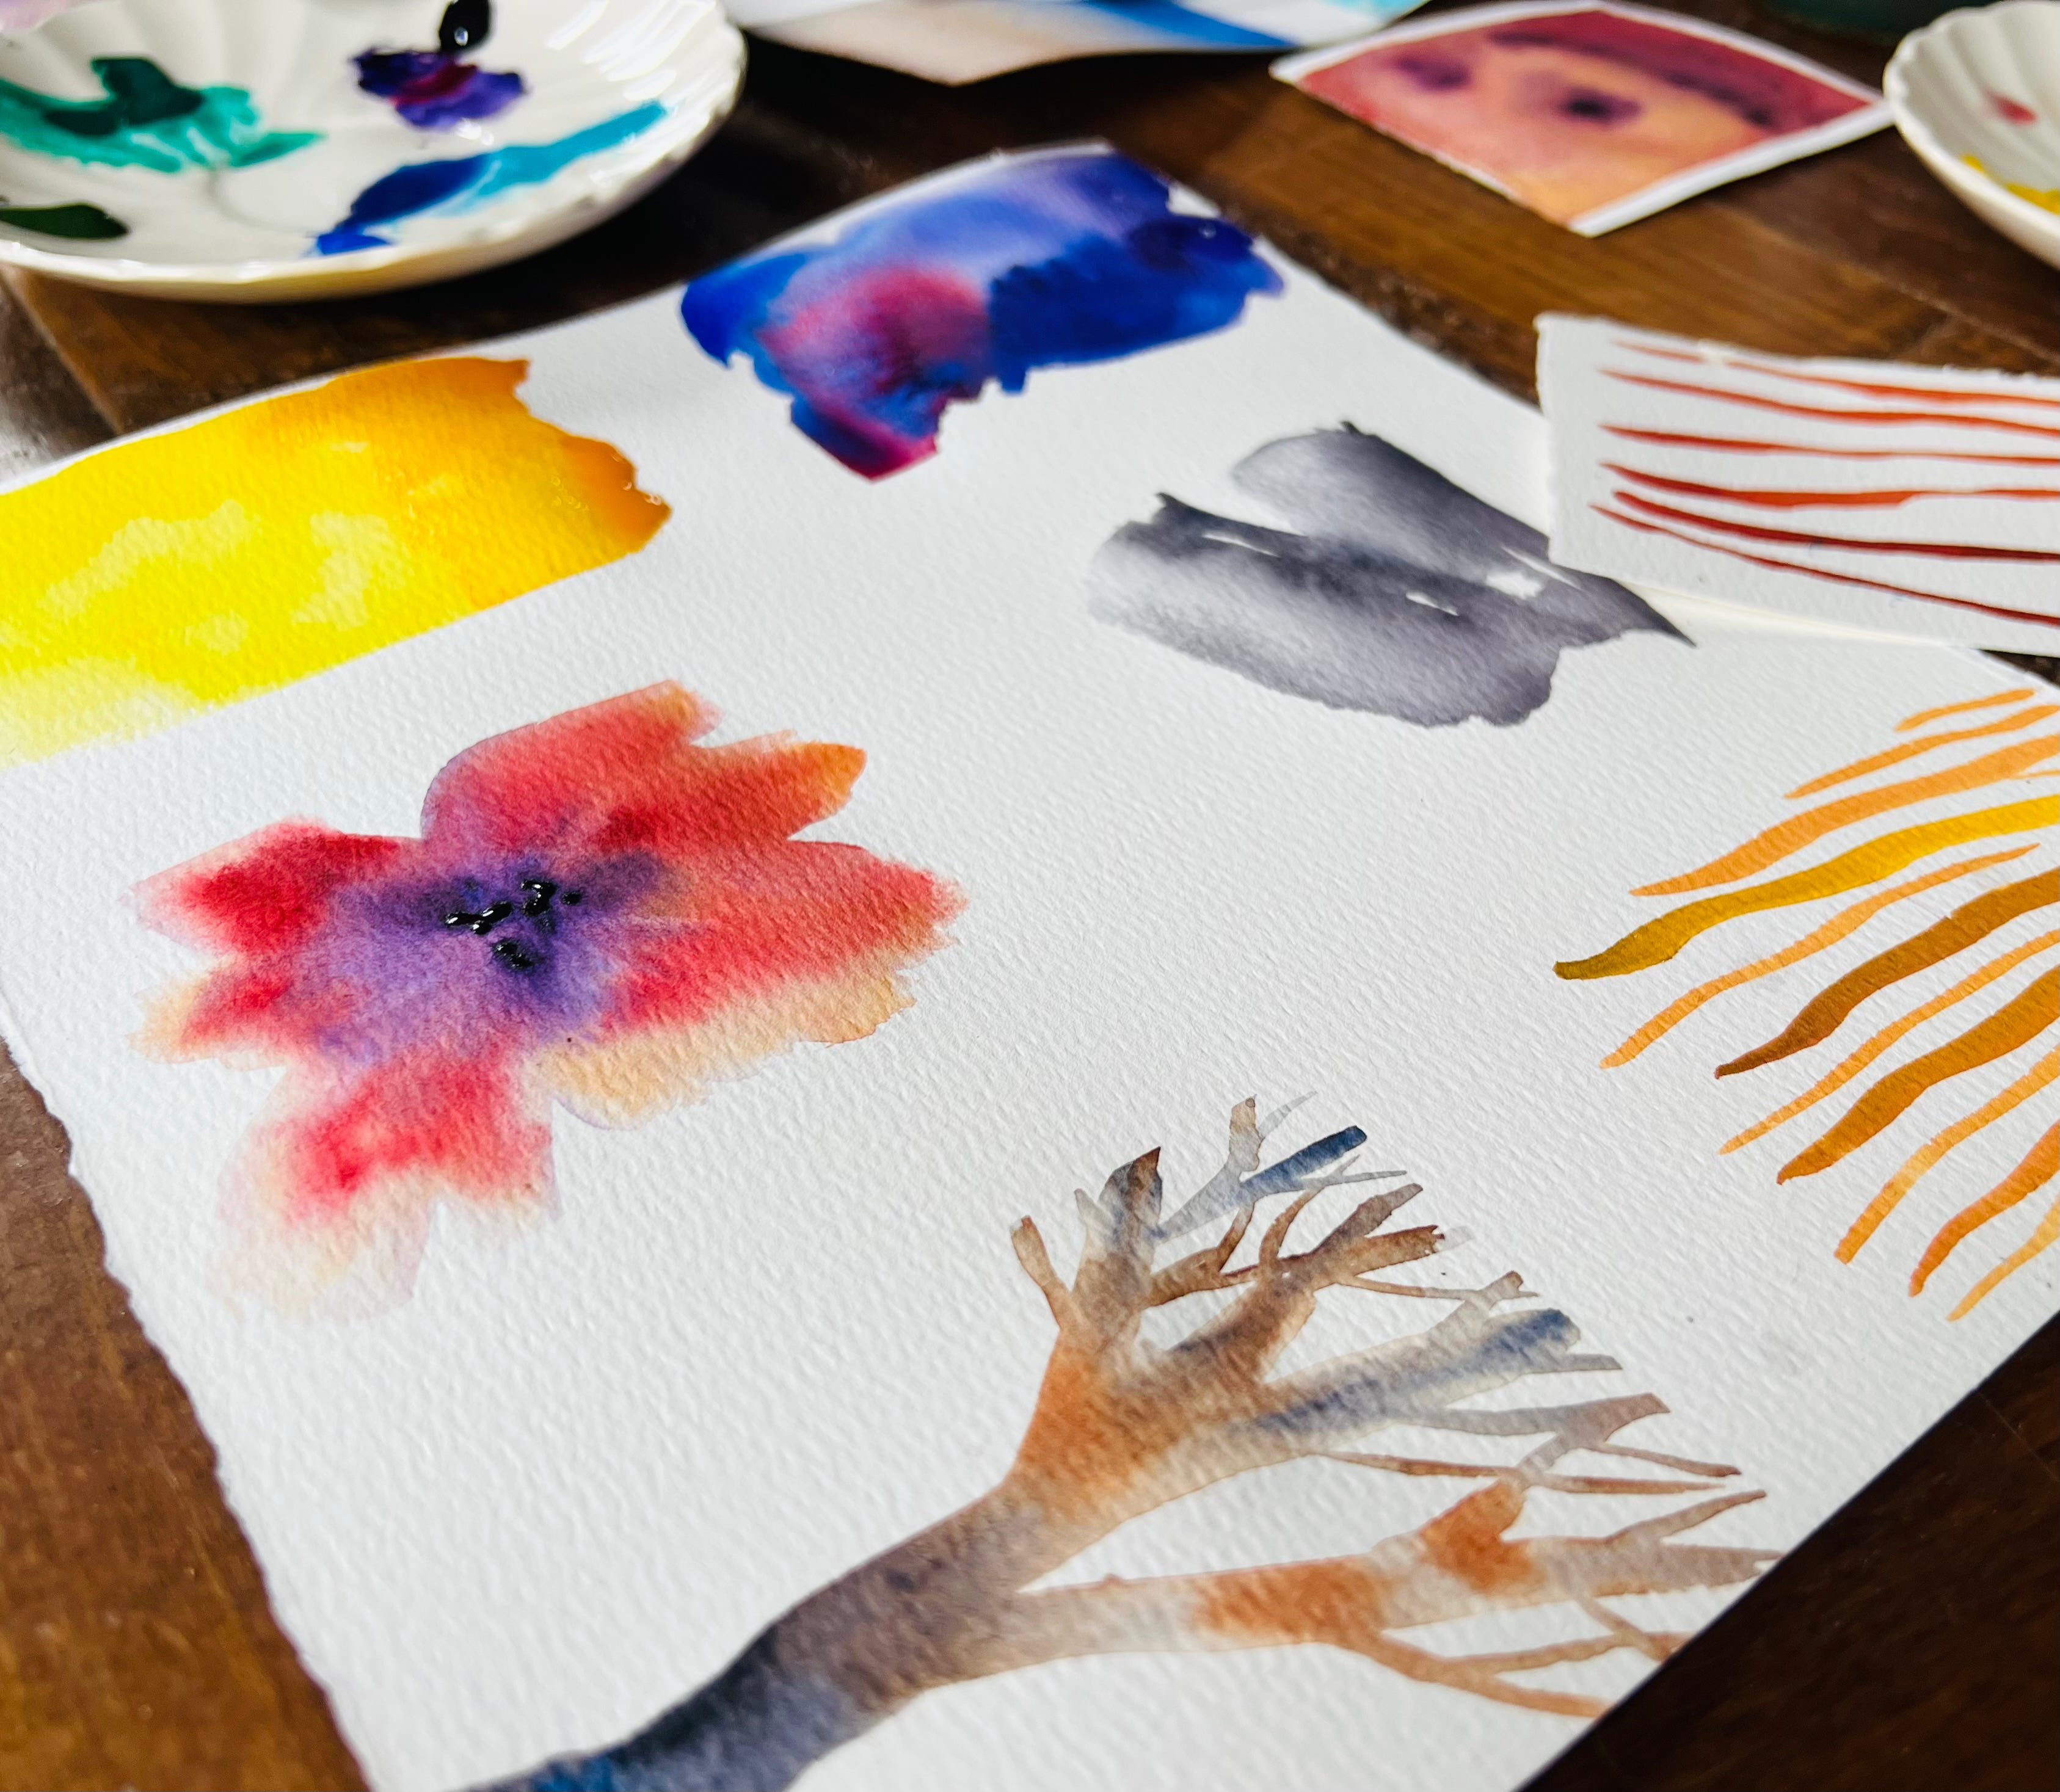
9. Wet-on-Dry
Here, you’ll paint with a wet brush on dry paper, creating defined, crisp edges. This method offers more control, making it perfect for detailed elements or layering.
Effect: The brushstrokes retain their shape, ideal for leaves, branches, or adding details over a background wash.
10. Wet-on-Damp 2
In this variation, the paper is slightly wetter than in the previous method. The result is a more pronounced flow and blending of color, though still somewhat controlled. You’ll achieve feathered edges with a softer diffusion.
Effect: This is ideal for foggy landscapes, gentle transitions, or muted backgrounds.
11.Glazing
Glazing is the process of layering thin, transparent washes over a dry base layer. Each layer deepens the color and creates complexity without muddying the hues.
Effect: This technique adds luminosity and depth, perfect for building up rich colors in florals, landscapes, or abstract compositions.
12.Creating Forms with a Clear Wash
To build delicate shapes, use a clear (clean water) wash first, then drop in pigment while the surface is still damp. The paint will softly follow the water’s boundary, creating gentle, ghost-like forms.
Use this for: Subtle foliage, misty tree silhouettes, or abstract forms.
Final Tips for Your Practice
• Patience with drying times: For techniques like glazing or lifting, ensure previous layers are fully dry before applying the next.
• Brush control: Experiment with different brush sizes and shapes to create varied effects.
• Water-to-paint ratio: Adjust the water content to control pigment intensity and spread.
Let these techniques spark your creativity, whether you’re painting seasonal landscapes, botanicals, or animals or playing with abstraction. Enjoy the fluid, unpredictable beauty of watercolor!
Char XXX


Share this post